Automatic Book Scanner using an Arduino and Lego
Stream Multiple Cameras Raspberry Pi with IVPort/Arducam Multicam
For an experimental setup for our students, I was looking for a cost-effective way to display to cameras on one screen simultaneously. I’ve found the IVPort/Arducam Multicam Adapter here with a github-repository here.
Unfortunatelly it was not possible to simply display to camera images on the screen without saving the Jpg first. For one of our experiments we needed this. One camera shows the fourierplane of a lens, where as the other captures the image. After some research, I was able to do this with the help of OpenCV and the PiCamera project.
Maybe other could also benefit from this code. Therefore I’ve posted it in a Github Repo. If you’ve any questions, feel free to contact us.

Code can be found here: https://github.com/beniroquai/misc-tools/blob/master/PYTHON/Raspberry/IVPort_Stream_Multiple_Cameras.py
How to drive a Image Stabilizer (Voicecoil Actuator) from a Cellphone Lens to use for various purposes?


Well, one could ask: Why is anybody asking such a weird question. Well. Thousands of million dollars, euros and remnibis are spend for cellphone research. Why not benefiting from an already existing technology and skip the step of inventing and developing anything from scratch?
In our optics-lab we have all the fancy microscopes to play with, but if it comes to add something new to it, one has to buy fancy adapters from one of the big lab-outfitter such as Thorlabs or Edmund. This is always expensive. Back in the days when I was a student I had no money and had to be creative to satisfy my creativity by taking off-the-shelf components laying in my backyard and build it. This hasn’t changed and thus I’m still trying to recreate existing technology for a cheap price – Science for a dime.
Many new cellphones have these optical image-stabilizers where the lens can not only be manipulated in Z-direction to focus the image onto the sensor, but also in X/Y translation to compensate for shakes from the photographer. This is done by moving the lens using voice coils. The lens is kept in a magnetic field, hold in place by little springs. Applying a current to the voicecoile, the electromagnetic field applies a force perpendicular to the cupper-windings and the entire lens is moved back/forth depending on the current.
Therefore we took an old audio amplifier and created a PCB:
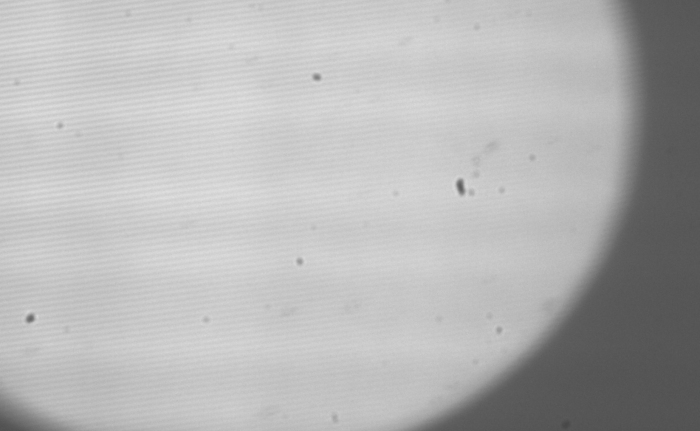
The movement of the lens was actually characterized by a high-speed camera (IDS IX4) at 1800 fps. Therefore we illuminated the lens with a laser and captured the motion of the focus spot (center of mass) in X/Y direction. We controlled it by addressing a sinusoidal voltage signal (from an Android APP actually), amplified by an Audio-AMP and then sending it to the lens (setup on photos). The first result – as expected:
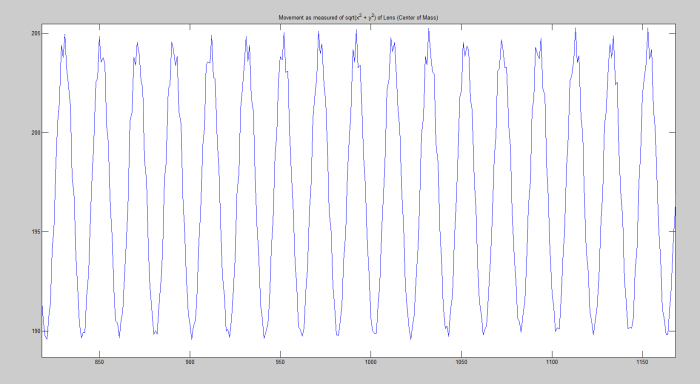
And the full movie from the acquisition sequence:
Moving voicecoil autofocus from a cellphone Lens (LG G3) using an Arduino
In the lab sometimes one needs a possibility to move something along the Z-direction. Many – mostly expenssive – possibilities are around. Piezo driven actuators are around from many different companies for example.
For my optical interferometer I had to move a mirror. Therefore I was thinking of a cheap and easy to use
Stevie Wonder under the Microscope
Today we produced this neat image with an old Zeiss Jamin-Lebedeff Interference Microscope. We developed some adapter for the polarizer to adjust its orientation. Our 3D printer made the housing. The 50 years old Microscope is now equiped and ready to work – again!

3D-printed interferometer
Digital Interferometer using a DMD as a scanning lightsource for all-in-all less than 200€. (+ evtl. 100 € for kinematic-mounts)
Description follows soon…


Fringes:
Tutorial on how to integrate Tensorflow (JAVA-API) into Android-Studio – from scratch

There are several ways, how one can integrate the powerful machine-learning framework of Google into an Android App, but most of the examples – at least the ones I found – only showed how the example build has to be built using the Bazel build tools. I wanted tot he „old-school“ way using just the Android Studio and use the Tensorflow Framework as a 3rd party dependency.
„Tutorial on how to integrate Tensorflow (JAVA-API) into Android-Studio – from scratch“ weiterlesen
Think outside the box: Use Ninjaflex with LEDs and textiles

There are several materials to use with 3D printers. Most of the time I use PLA in my prints, but there is also ABS (the „Lego“-material), PMMA and Plexiglas. There is also this comparable new thing called Ninjaflex. It can be used as any other filament, but the result is flexible. Astonishingly flexible!


„Think outside the box: Use Ninjaflex with LEDs and textiles“ weiterlesen
Arduino IL9341 LCD MATLAB/Python/Serial interaction
A very cheap method to realize a spatial light modulator one can simply use an off-the-shelf LCD module driven by an Arduino. When removing the backlight and putting the LCD in the optical path, it acts as a very cheap mask. Controlling the device via MATLAB or PYTHON is an easy task to do!

In my work I tried to implement a SERVER<-> Client interarction, where Matlab sends command and the Arduino executes them.
„Arduino IL9341 LCD MATLAB/Python/Serial interaction“ weiterlesen
